
NEWS at Quanex
See the latest news, posts and events from Quanex about our business, the industry, our people and more.
How to Choose Animal Specimens for Educational Use?
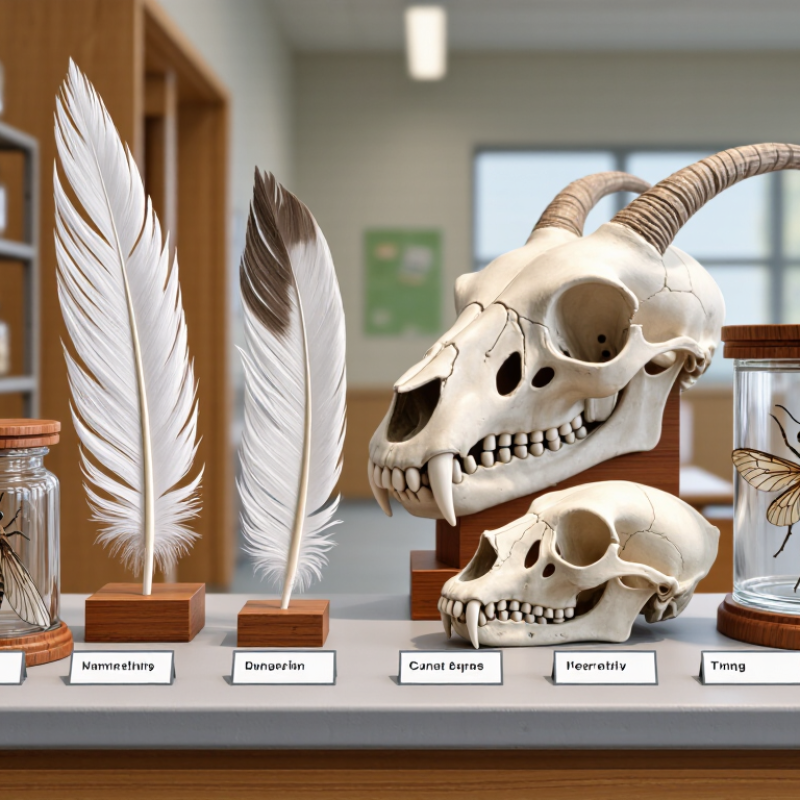
Choosing an Aniaml Specimen for education is not simply a matter of selecting the most striking object. A feather, skull, or preserved insect can make a lesson tangible, but its value depends on accurate identification, clear teaching goals, and responsible sourcing. Students should be able to see meaningful details, such as the ridges on a feather or the shape of a jaw, without the specimen becoming a distraction. Small details matter.
A careful selection process considers the learners’ ages, classroom setting, handling needs, and the specimen’s condition. Labels should provide reliable information about the species, origin, and preservation method whenever available. Teachers can check these details against reputable museum, university, or educational resources rather than relying on a seller’s description alone. A specimen should be clean, stable, and suitable for display; any handling guidance should be clear. Some materials may require extra care, and not every classroom needs a real specimen. High-quality photographs, models, or digital collections may teach the same concept more safely and accessibly.
There is no single best choice for every lesson. A realistic object may prompt curiosity, yet it can also raise questions about where it came from and why it was collected. Those questions deserve honest answers. This guide explores how to match specimens with learning objectives, evaluate quality and documentation, and consider practical alternatives. Good choices support observation and respect for animals. They also leave room to reconsider whether a specimen is truly necessary.
Define Learning Goals and the Needs of the Intended Audience
Choose a specimen only after naming the learning goal. A lesson on adaptation may call for visible feet, teeth, or protective coloring. A lesson on anatomy may need clear structures students can compare. For younger learners, a sturdy, easily recognized specimen can hold attention without overwhelming them. A small bird skull may be useful for older students, but confusing for a class still learning basic body parts. Keep it concrete. Decide what students should observe, describe, or compare before choosing the object.
The intended audience also shapes questions of size, detail, and handling. Students with limited experience may benefit from a specimen that is easy to view from several angles, with labels that explain unfamiliar terms. For advanced learners, subtle features can support careful comparison and discussion. Consider allergies, sensory sensitivities, and whether students will handle the specimen or only view it. Details matter. A clear container, good lighting, and a scale beside the object can make observations more reliable. Use specimens prepared and sourced responsibly, and check that their condition suits repeated classroom use. A short trial lesson may reveal whether students notice the intended feature or focus on the specimen itself.
How to Choose Animal Specimens for Educational Use
Start with the learning goal and the needs of your intended audience. Comparing typical specimen size can help with visibility and handling, but size alone does not determine suitability.
Approximate adult length ranges vary by species and individual. Select specimens that support the learning objective and are appropriate for learners’ age, experience, and handling conditions.
Compare Specimen Types for Different Educational Settings
Choose specimens by what learners must observe, not by appearance alone. A preserved whole specimen reveals body proportions and adaptation, but delicate features can be hard to see across a classroom. For small groups, a teaching-quality specimen paired with a hand lens supports close inspection. In large classes, replicas are easier to handle and repeat, though they may hide texture or natural variation. Digital images work well when storage or access is limited. They cannot show the weight or surface of a real object.
The setting matters. A primary classroom may benefit from sturdy replicas and large, clearly labeled specimens; secondary biology students can compare structures with a microscope or specimen tray. Scale matters. Before choosing, check that the specimen’s condition, labels, and source information suit the lesson. Avoid using a dramatic example if students cannot connect it to the learning goal. There is no perfect format, and a mixed set can be more useful than one impressive object.
The 2024 National Assessment of Educational Progress, reported by the National Center for Education Statistics, found that 31% of U.S. eighth graders performed at or above Proficient in science. That figure does not prove specimens improve achievement, but it underscores the value of making scientific ideas observable. For a shared lesson, pair one real specimen with a replica or annotated image. Ask learners to note what each format reveals—and what it leaves out. One limitation: even careful labels cannot replace discussion of uncertainty and variation.
How to Choose Animal Specimens for Educational Use? — Compare Specimen Types for Different Educational Settings
| Specimen Type | Best-Suited Educational Settings | Learning Strengths | Handling and Safety | Storage and Care | Key Selection Consideration |
|---|---|---|---|---|---|
| Three-dimensional replicas and models | Preschool and primary classrooms, outreach programs, libraries, and high-traffic exhibits | Allow repeated handling and close observation of anatomy, life stages, or adaptations without using biological material. | Usually the easiest option for supervised hands-on activities. Check for small detachable parts, sharp edges, and age-appropriate materials. | Generally require only routine cleaning and dry storage; follow the material-specific care instructions. | Choose replicas when durability, frequent handling, and low maintenance matter more than examining real biological tissue. |
| Digital images, videos, and interactive specimens | Remote learning, large classes, introductory lessons, and settings with limited storage or specimen access | Can show magnified structures, movement, internal anatomy, and changes over time; content can be shared with many learners. | No physical specimen-handling risk. Provide accessible captions or descriptions and check image permissions before reuse. | Require suitable devices, electricity or internet access where applicable, and a plan for maintaining digital files. | Choose when broad access or views of fragile, rare, or difficult-to-observe material are priorities. |
| Cleaned bones and skeletons | Middle- and high-school biology, comparative anatomy, museums, and supervised laboratory lessons | Support study of skeletal structure, joints, locomotion, and differences among species. | Use prepared, clean specimens from a documented source. Inspect for sharp edges and loose parts; wash hands after handling and do not allow eating or drinking nearby. | Keep dry and protected from dust, pests, and breakage. Store small bones in labeled, closed containers. | Confirm identification and lawful, ethical sourcing; do not use unprepared remains of uncertain origin. |
| Wet-preserved specimens | Advanced secondary biology, college laboratories, and supervised demonstrations | Show soft tissues and internal structures that may not be visible in dry specimens or models. | Keep in a properly sealed container and avoid student contact with the preservative. Some collections may contain formaldehyde or other hazardous chemicals; follow the label and institutional safety procedures. | Store upright in a secure location, away from heat and direct sunlight. Check containers regularly for leaks, damage, or fluid loss. | Use only when the educational value justifies the added chemical-safety and storage requirements; consult the safety data and local rules. |
| Taxidermy mounts | Museum displays, ecology lessons, and supervised classroom demonstrations | Help learners observe external form, coloration, posture, and adaptations at realistic scale. | Best treated as display specimens rather than handled objects. Older mounts may contain dust or historical treatment chemicals; avoid disturbing the surface and follow collection guidance. | Keep in a dry, stable environment away from direct sunlight, pests, and excessive handling. Use appropriate conservation advice for valuable specimens. | Check condition, provenance, and any available treatment history, especially for older or inherited mounts. |
| Pinned insects and other small invertebrates | Middle- and high-school biology, university teaching collections, and supervised identification activities | Make it possible to compare body regions, wings, legs, and variation among specimens. | Keep specimens in closed display cases. Pins are sharp, and delicate specimens can be damaged by touch; use magnifiers rather than passing them around. | Store in a dry, secure case and monitor for dust, moisture, and insect pests. | For younger learners or frequent handling, consider sealed displays, digital magnification, or robust replicas instead. |
| Cast or impression specimens | Primary and secondary classrooms, field-study programs, and hands-on ecology lessons | Provide durable evidence of features such as tracks, shells, or surface patterns without requiring the original specimen. | Usually suitable for supervised handling, but inspect for brittle edges, dust, or materials that could be unsuitable for the intended age group. | Store in labeled trays or boxes; protect fragile casts from drops and prolonged exposure to heat or sunlight. | Choose casts when learners need tactile comparison or when collecting or handling originals is impractical. |
Check Ethical Sourcing, Legal Requirements, and Safety Risks
Before choosing a specimen, ask where it came from and whether its history can be verified. Request written provenance, preservation details, and confirmation that collection, sale, transport, and classroom use meet applicable local rules and institutional policies. Check any permit or documentation requirements before purchase. Prefer specimens with clear, responsible sourcing and avoid material whose origin is vague. Paperwork matters.
Safety needs the same scrutiny as ethics. CDC reports that 6 in 10 known human infectious diseases can spread from animals, and 3 in 4 emerging infectious diseases originate in animals (CDC One Health). WHO notes that more than 200 zoonotic diseases are known. These figures do not mean every preserved specimen is hazardous, but they argue against assuming one is risk-free. Review the safety data sheet, inspect seals for leaks, and confirm suitable storage, ventilation, and protective equipment. Keep specimens away from food areas, and follow your school’s handling and disposal procedures. Do not guess. I still find a sealed jar’s quiet appearance reassuring; that instinct deserves a second look.
Assess Specimen Accuracy, Condition, and Accessibility
An educational specimen should teach the feature named on its label, not merely look convincing. Check its identification against a reliable reference, and compare visible traits such as beak shape, limb arrangement, or distinctive markings. Ask how it was identified and whether its origin is documented. For a classroom, a clear label should include common and scientific names, plus any limits on identification. A label can still be wrong.
Tips: Inspect the specimen under bright, even light. Look for cracks, loose parts, fading, dust, or signs of pests. For wet-preserved material, check the seal and make sure the specimen remains visible. Ask about cleaning and storage guidance before purchase or loan. A quick glance is not enough.
Accuracy and condition matter only if learners can examine the specimen. Choose a size that fits the room, and consider whether details are visible from a desk or screen. Provide magnified images or tactile alternatives when close handling is unsuitable. Use readable labels and plain language. Accessibility is practical, not decorative. Test the display with a learner. What seems obvious to an instructor may not be obvious to everyone.
Plan Specimen Care, Display, and Classroom Use
Choose animal specimens that directly support a lesson, such as comparing feather patterns or examining a skull’s shape. Check that each specimen has clear source documentation and is appropriate for your school’s policies. Prefer durable, well-preserved examples with labels noting the species, origin, and relevant safety guidance. Keep care instructions with the specimen, and follow them for storage, cleaning, and handling. Small labels matter.
Plan the display before class. Place specimens in stable cases, away from direct sunlight, heaters, and busy walkways. Set them at a height students can view without crowding or touching. For hands-on lessons, provide clear handling rules and supervise closely; use photographs or replicas when a specimen is fragile or unsuitable to handle. I have found that a neat display can still confuse students if labels are hard to read. Review the setup from a student’s perspective, and adjust what feels unclear.
Tips: Keep an inventory, inspect specimens for damage, and record any care concerns. Invite students to observe before handling. A little reflection helps. Which details sparked questions, and which were overlooked? Use those observations to improve the next lesson.
