
NEWS at Quanex
See the latest news, posts and events from Quanex about our business, the industry, our people and more.
How to Choose the Best Exterior Plywood
Choosing Exterior Plywood is not simply a matter of picking the thickest sheet. The right panel depends on exposure, support spacing, finish, and how long rain may reach its edges. A sheet stored beside a damp garage wall can behave differently from one protected beneath a finished roof. Small details matter.
The USDA Forest Products Laboratory’s Wood Handbook, General Technical Report FPL-GTR-282, documents how moisture affects wood’s dimensions and performance. Researcher Samuel V. Glass, a coauthor of the handbook, describes wood as “hygroscopic”—it gains or loses moisture from surrounding air. That simple word has practical consequences. APA – The Engineered Wood Association’s panel guidance distinguishes Exterior-rated panels from Exposure 1 panels, which are intended for temporary construction exposure rather than continual weather contact. Exterior plywood is not automatically waterproof; good installation and protected edges still matter.
This guide will compare grades, thicknesses, bond classifications, and common uses, using those technical references as a starting point. It will also consider visible clues, such as stamped panel ratings and veneer defects, while noting what a quick inspection cannot confirm. A label helps, but it does not reveal every storage or manufacturing condition. That limitation deserves attention. For projects exposed to repeated wetting, verify the panel’s rating and follow the manufacturer’s installation instructions before buying.
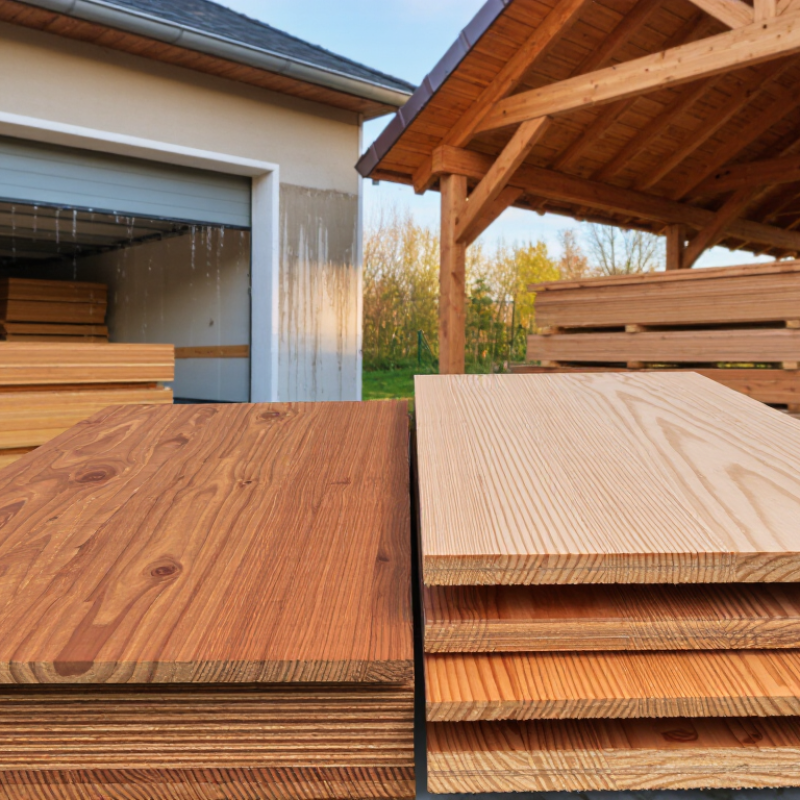
Understanding What Makes Plywood Suitable for Exterior Use
Exterior plywood is built to tolerate moisture, but “exterior” does not mean waterproof. Its adhesive is designed to resist repeated wetting, helping the veneers stay bonded when weather reaches the panel. Look for a clear exterior-use rating and check that the panel suits its intended structural load. Labels and grading rules vary, so confirm the product documentation rather than relying on a quick glance at the surface.
Pay attention to the edges. Water can enter exposed veneer layers, especially where cuts, screw holes, or damaged corners remain unsealed. A small rough patch may become a swollen edge after repeated rain. Keep panels raised from soil and standing water, provide drainage, and seal cut edges with a suitable coating. Good airflow matters, too. On site, a covered panel can still trap moisture if it rests flat against a damp surface. That detail is easy to miss.
The face veneer is not the whole story. Check for open voids, delamination, and damage before installation; a neat-looking face can hide weak spots within. Exterior-rated plywood is also not automatically suitable for permanent ground contact or every climate. I would not assume one coating solves every problem. Match the panel, finish, and installation details to the exposure, then inspect them over time.
Matching Plywood Types to Exposure and Project Requirements
Exterior plywood should be matched to the weather it will face and the job it must do. For a sheltered soffit, a suitable exterior-rated panel may be enough when its edges are sealed and the finish is maintained. Siding exposed to wind-driven rain needs panels rated for exterior use, plus careful flashing and drainage. “Exterior” describes the adhesive bond, not a promise that the panel can stay wet indefinitely.
Check the panel’s grade, thickness, and span rating against the framing and expected loads. A smooth face can suit painted trim, while rougher grades may work beneath other finishes. For outdoor furniture or a small shed, cut quality matters too: splintered edges can admit moisture. Seal cut edges, fastener holes, and exposed faces with a compatible coating. Even good plywood can swell if water gets trapped behind it. I have seen that detail overlooked; it is easy to do.
Tips: Read the panel stamp before buying. Confirm the exposure rating, structural grade, and recommended spacing. Store sheets flat and dry before installation. Edges matter. Don’t assume thicker is always better; choose a panel that fits the design and support spacing. Marine-grade plywood is not automatically necessary for every outdoor project, and it still needs suitable protection.
How to Choose the Best Exterior Plywood — Matching Plywood Types to Exposure and Project Requirements
| Exposure or Project Need | Suitable Plywood Type or Rating | Why It Fits | Key Limitations and Installation Notes |
|---|---|---|---|
| Temporary weather exposure during construction | Exposure 1-rated structural plywood | Its bond classification is intended to withstand limited exposure to weather during construction. | Exposure 1 is not a recommendation for permanent, unprotected outdoor use. Cover the panels and install the finished assembly promptly. |
| Long-term outdoor use where the panel may be exposed to moisture | Exterior-rated plywood | Exterior bond classification is designed for repeated wetting and drying conditions. | The rating concerns the glue bond, not a guarantee that the panel is waterproof or immune to decay. Protect faces, edges, and cutouts with an appropriate finish or covering. |
| Roof or wall sheathing beneath a weather-resistive covering | Structural plywood with a grade and span rating specified for the assembly | Structural panels are manufactured for load-bearing applications and are commonly used as sheathing. | Follow the plans and local code for panel thickness, support spacing, fastening, and edge support. The roof or wall covering provides the primary weather protection. |
| Exterior trim, soffits, or painted architectural panels | Exterior-rated plywood with a face grade suited to the desired finish | Exterior bonding supports outdoor use, while a smoother face can provide a better base for paint. | Seal edges and surface defects, use a compatible exterior primer and finish, and provide drainage and ventilation where the design requires them. |
| Boatbuilding or applications with demanding exposure and quality requirements | Marine plywood meeting the applicable marine standard or project specification | Marine specifications commonly require durable bonding and tighter limits on core defects than general-purpose panels. | Marine plywood is not automatically waterproof, rot-proof, or chemically treated. Select the appropriate standard, protect the panel, and follow the vessel or project design. |
| Ground contact or persistent, severe wetting | Pressure-treated plywood specifically labeled for the intended use, or a material specified for the application | Treatment may provide protection against biological decay when the product is rated for the actual exposure. | Ordinary exterior plywood is not necessarily suitable for ground contact. Check the treatment label, use compatible fasteners, and observe local code requirements. |
| Outdoor furniture or a project with visible exposed panel edges | Exterior-rated plywood selected for the required strength and face quality | It can be cut and finished for many outdoor projects when the panel is appropriately specified and protected. | Edges and end grain absorb moisture readily. Seal them carefully, avoid water-trapping details, and maintain the finish as needed. |
Selection tip: Match the bond classification to the expected exposure, then check the panel’s structural grade, thickness, span rating, treatment, and applicable local standards. A plywood rating alone does not replace sound detailing or weather protection.
Comparing Grades, Veneers, Cores, and Bonding Standards
Exterior plywood selection starts with the grade, but grade mainly describes the face veneer, not the panel’s weather resistance. A smooth A-grade face suits visible walls, while lower grades may show knots, patches, or splits. Check both sides if the panel will remain exposed. Look closely.
Veneer species affects appearance and sometimes weight, but the core matters just as much. Thin, even veneers help create a flatter panel; gaps inside the core can weaken screw holding and show as bumps after painting. Inspect a cut edge for voids and loose layers. A small defect can become obvious on a large, sunlit wall.
Bonding standards tell you more about moisture performance than a clean-looking surface does. Choose panels marked for exterior exposure under the standard used in your region, and confirm the stamp with the supplier. “Exposure 1” generally tolerates construction moisture, but it is not intended for permanent weather exposure. Exterior-rated adhesive still cannot prevent edge swelling, so seal cut edges and protect the panel with a suitable finish. On sheds and outdoor walls, neglected edges are often the first place damage appears. I would not rely on a sales description alone; stamps and installation details matter more.
Checking Panel Thickness, Dimensions, and Product Certification
Choosing exterior plywood starts with the job, not the label. Measure the frame and support spacing before buying. Standard sheet dimensions may not suit every project, and trimming can leave narrow strips that are difficult to support. Check the edges for delamination, open voids, and uneven cuts. Small gaps matter where water can collect.
Thickness needs careful checking. Nominal sizes and actual measurements can differ, so consult the product data and measure a sample when a close fit is critical. For roof or floor sheathing, match panel thickness to joist or rafter spacing and applicable design requirements. A thicker panel alone will not prevent movement; sound support and correct fastening matter too. Dimensions are easy to overlook on paper, then frustrating at installation. Worth checking twice.
Look for a legible grade stamp and documents that identify exterior suitability, adhesive classification, and the applicable performance standard. Certification should be traceable to a recognized testing or assessment program, not just a vague “weatherproof” claim. Confirm the paperwork matches the exact panel type and thickness. Store sheets flat, raised from damp ground, and covered while allowing airflow. Even certified panels can suffer if their edges stay wet before sealing or installation.
How to Choose the Best Exterior Plywood: Thickness, Dimensions & Certification
In common U.S. plywood sizing, the actual panel thickness may be slightly less than its nominal size. For example, a nominal 1/2-inch panel is commonly about 15/32 inch thick. Check the product specification for exact thickness and dimensions, and verify the panel’s grade stamp or documentation for certification and exterior-use suitability. Requirements and available sizes can vary by product and standard.
Selecting and Protecting the Right Exterior Plywood
Choose panels by exposure rating, not appearance alone. APA—The Engineered Wood Association’s Engineered Wood Construction Guide distinguishes Exterior panels, made for repeated weather exposure, from Exposure 1 panels, intended for temporary construction exposure. Neither rating makes a panel immune to standing water or sunlight. Check the grade stamp, required thickness, and support spacing against your project plans. For a shed wall, that means matching panel thickness to stud spacing, not just picking the smoothest face. Keep water moving. Leave drainage gaps where the design calls for them, and use compatible, corrosion-resistant fasteners.
Protection starts at the edges. Seal cut edges and penetrations with a coating suitable for exterior wood, then maintain the finish as it wears. The USDA Forest Products Laboratory’s Wood Handbook: Wood as an Engineering Material notes that decay fungi generally need wood moisture content above about 20 percent. Treat that figure as a warning, not a precise pass-or-fail limit. Inspect lower corners, joints, and areas behind trim after heavy rain. A small missed gap can hold water against the panel. It is easy to focus on the face and overlook the edge; I would double-check both before closing the wall. Avoid trapping wet plywood behind an impermeable finish, and follow the coating maker’s surface-preparation instructions.
