What Is Exterior Door Casing?
An exterior door casing is the visible trim that frames a home’s outside entrance. It covers the joint between the door frame and the surrounding wall, giving the opening a finished appearance. It may also help shield exposed edges from weather, though casing alone cannot prevent water intrusion. Proper flashing, sealant, and sound installation matter too.
Profiles range from simple, flat boards to layered trim with decorative edges. Common materials include wood, composite products, and cellular PVC; each has different costs, maintenance needs, and limitations. There is no single best choice. Climate, wall construction, and the home’s style all influence what works well. A crisp, painted edge can look inviting, but even a small gap may collect water or reveal uneven cuts. Details matter.
This guide explains what exterior door casing does, how its parts fit together, and which materials homeowners may encounter. It also covers basic sizing, installation considerations, maintenance, and signs of wear. You will see why casing should align neatly with the frame and meet the siding carefully. Some projects look straightforward until an old layer of trim comes off. That can expose hidden damage, so inspect the opening before choosing replacement pieces. A little uncertainty is normal; the right approach depends on the condition of the doorway, not appearance alone.
Definition and Purpose of Exterior Door Casing
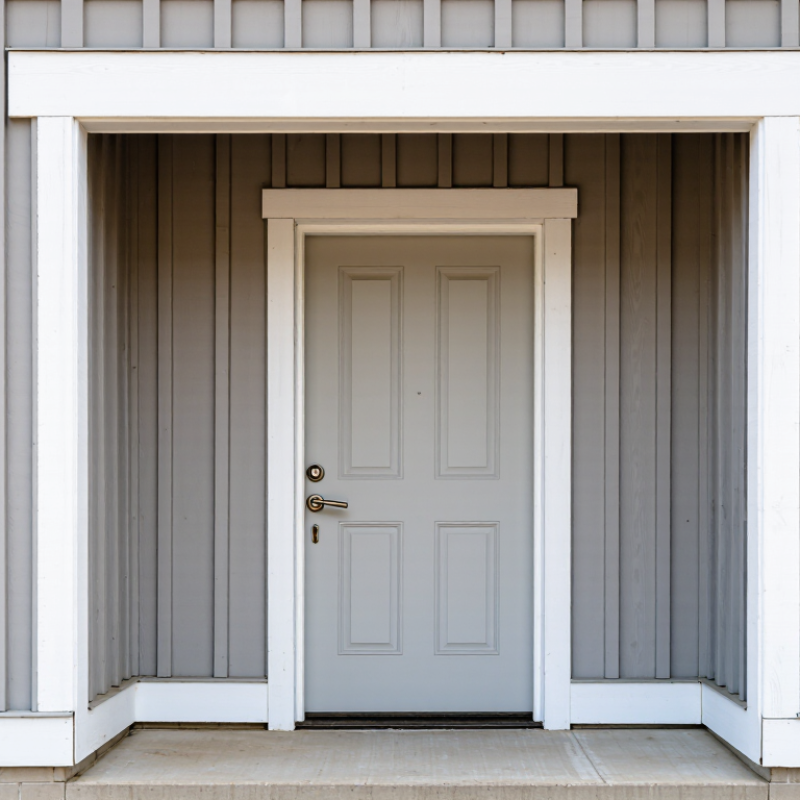
Exterior door casing is the visible trim surrounding a door frame, usually fitted along the two sides and across the top. It covers the narrow gap between the frame and the wall, hides cut edges, and gives the entry a clean visual border. Outside, it also helps shield that joint from direct rain and sunlight.
It is not the primary waterproofing layer. Flashing, a sound sill, and properly sealed joints do that work. A trim board can look tight and still conceal a weak seal.
The distinction matters for comfort and durability. The U.S. Department of Energy’s Energy Saver guidance estimates that air leakage can account for 25–40% of heating and cooling energy use in a typical home. That figure applies to the whole building, not casing alone, but it shows why gaps around an exterior door deserve attention.
ASTM E2112, a standard practice for installing exterior windows, doors, and skylights, also emphasizes installation details that manage water. On site, check that casing sits evenly, its lower ends shed water, and sealant remains continuous without blocking drainage.
Small details. Easy to overlook.
Main Parts of an Exterior Door Casing System
What Is Exterior Door Casing?
Main Parts of an Exterior Door Casing System
Exterior door casing is the trim around a door opening. It covers the seam between the door frame and the wall, giving the entry a finished edge. It is not the door frame itself. A typical system includes two side casings and a head casing across the top. The exact profile and materials vary with the home’s design and exposure to weather.
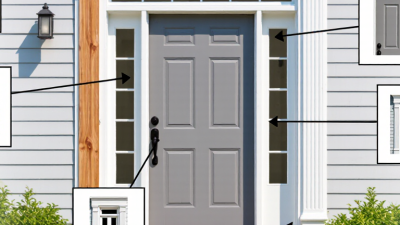
Side casings run vertically beside the frame. The head casing spans above the door and often sheds water toward the sides. Many installations also use a drip cap or flashing above the head casing to direct rain away from the wall. Sealant closes appropriate gaps, but it should not block drainage paths. That detail is easy to overlook. Trim alone cannot correct poor flashing or a badly fitted frame. A small gap at the top can become a bigger problem after repeated wet weather.
Tips: Check that the head flashing slopes outward and remains clear of debris. Look for cracked sealant and soft, swollen wood after rainy seasons. Details vary, so follow the door manufacturer’s installation instructions. I’d also inspect the bottom edges; they often show wear first.
Common Materials and Design Options
Exterior door casing frames the opening and shields the joint between the door frame and wall. Material choice affects upkeep, movement, and appearance. Wood offers crisp edges and easy repainting. But it can swell or split when exposed to repeated wetting. The USDA Forest Products Laboratory’s Wood Handbook reports species-specific shrinkage values, underscoring why wood casing needs suitable sealing and installation. Cellular PVC resists moisture and insects, though it expands with heat. Leave the clearance required by its installation instructions. Composite trim can provide a wood-like profile with less routine upkeep, while aluminum suits clean, narrow lines. It can dent, though.
Design options range from flat boards to stepped profiles, with corner blocks or a simple head detail. Match the casing to the door scale; a wide, ornate profile can overwhelm a small entry. A practical detail: keep the lower edges clear of standing water, especially above a porch slab. Paintable materials allow color changes, but dark finishes may heat up in direct sun. The 2024 Cost vs. Value report estimated 188.1% cost recouped for a steel entry-door replacement nationally. That figure is not casing-specific, yet it shows how strongly an entry can shape perceived value. I would not treat it as a promise. Local labor, climate, and maintenance habits change the result.
How Exterior Door Casing Is Installed
What Is Exterior Door Casing?
How Exterior Door Casing Is Installed
Exterior door casing covers the joint between the door frame and the wall. It also helps shield this edge from rain. A sound installation depends on the layers beneath the trim, not just neat-looking corners. Check that the frame is square and the wall surface is dry. Repair soft or damaged material before covering it.
Fit flashing around the opening according to the door and weather-barrier instructions. The bottom edge must allow water to drain outward. Measure each casing piece at the opening; walls are rarely perfectly even. Cut the top corners, then test-fit the pieces before fastening them. Keep it level. Use exterior-rated fasteners suited to the casing material, and avoid driving them so tightly that the trim bends.
Seal appropriate joints with exterior-grade sealant, but do not block drainage paths. Leave any required clearance at the bottom edge. A narrow, uneven gap may seem harmless, yet it can admit water behind the casing. I would recheck the corners after fastening; small shifts are easy to miss. Follow the product instructions for spacing, paint, and sealing, since materials differ. If the wall continues to leak, new casing alone will not solve the problem.
Weatherproofing and Maintaining Exterior Door Casing
What Is Exterior Door Casing? Weatherproofing and Maintaining Exterior Door Casing
Exterior door casing is the trim surrounding a door frame. Outside, it gives the doorway a finished edge and helps protect the joint between the frame and wall. It is not a substitute for flashing or a properly installed weather barrier. Water can slip behind attractive trim, then stain siding or soften wood. A neat caulk line can hide trouble for a while.
Inspect the casing each spring and after severe storms. Look for cracked sealant, peeling paint, swollen edges, soft spots, and gaps where trim meets siding. Replace failed exterior-grade sealant, but do not block intentional drainage paths at the bottom of the assembly. If wood is damaged, find and correct the water source before patching or repainting. The U.S. Environmental Protection Agency notes that mold can grow on wet materials within 24 to 48 hours. That makes prompt drying important, especially around damp trim and wall cavities.
Tips: Press gently with a screwdriver handle; soft wood deserves closer inspection. Keep paint intact, and trim plants away from the doorway. A fresh bead is not a cure for hidden damage. When water keeps returning, check the flashing and installation, not just the casing.
Exterior Door Casing: Moisture Benchmarks for Weatherproofing
These are general reference values, not measurements of a specific door. Outdoor wood moisture varies with climate and conditions. Check casing for persistent dampness, peeling paint, soft spots, or failed caulk; repair water entry and allow the wood to dry. Sustained moisture content around 20% or higher can support wood decay.